
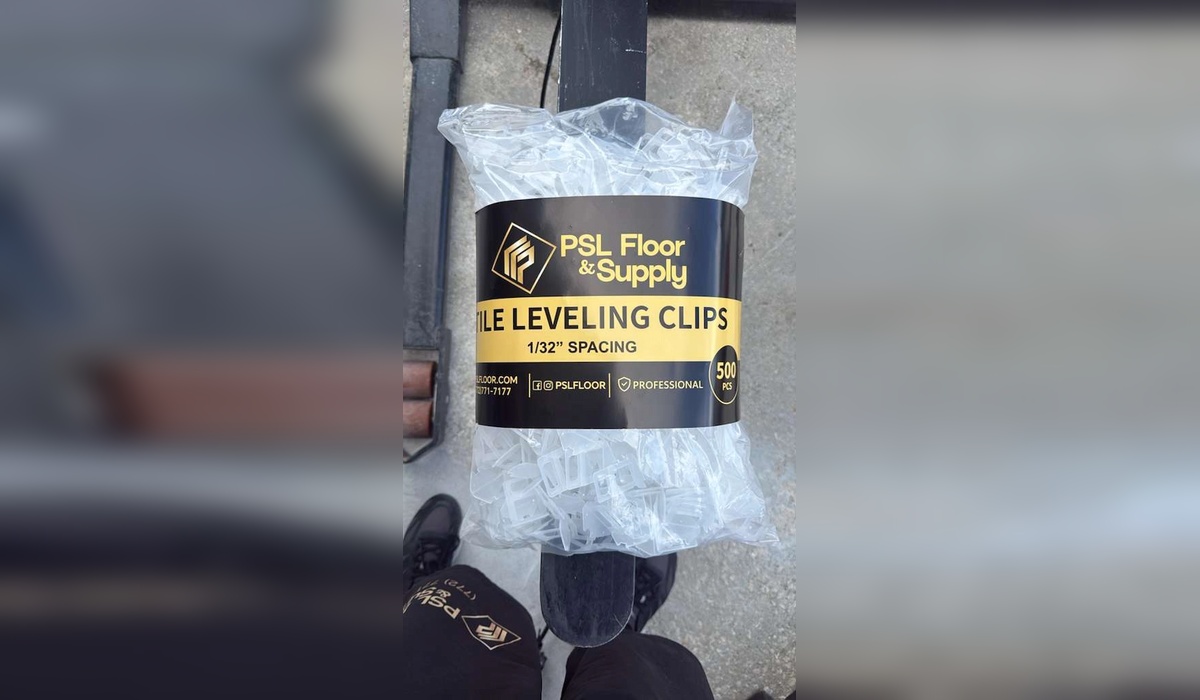
A tile leveling system eliminates the most persistent visible defect in professional tile installation: lippage — the height difference at a tile joint where one tile sits even a fraction of an inch higher than its neighbor after the adhesive cures. The system works through two components in sequence: tile leveling clips that establish position at each joint, and tile leveling wedges that apply the mechanical force locking adjacent tiles to the same plane before the mortar sets. Used correctly, the system produces a finished floor that reads flat from any angle, under any lighting condition, without manual adjustment or reliance on installer feel.
PSL Floor & Supply stocks the complete tile leveling system for same-day pickup in Port St. Lucie: 3,000 professional tile leveling clips in 1mm or 1.5mm for $99, 500 reusable tile leveling wedges for $30, and rectified porcelain and ceramic tile from $1.79/sq ft. Browse the clips and wedges page for full product details, or explore the complete product catalog for all accessories and flooring materials currently in stock.
What Is Tile Lippage — Why Every Tile Leveling System Matters
Tile lippage forms when adjacent tiles cure at different heights. The cause is typically a combination of factors: minor variation in the adhesive mortar bed thickness, slight bow or warp in the tile body, pressure from foot traffic through the workspace during installation, or the difficulty of manually registering two large tiles to exactly the same plane while the mortar is still open. Even experienced installers cannot reliably eliminate lippage by hand across a full room of large-format material.
The problem scales directly with tile size. On small-format tiles, minor lippage is partially absorbed by the tile’s proportions — the human eye is less sensitive to height variation when the reference area is small. On large-format rectified porcelain — 24″ × 48″ being the standard for modern installations — lippage is immediately visible. The long, flat tile surface amplifies any height difference at the joint; the precision-cut rectified edge turns that difference into a sharp, defined step rather than a gradual slope. A variation of barely 1mm across a joint on a 24″ × 48″ tile shows clearly under normal interior light from any angle. Understanding what tile lippage is explains precisely why the clip-and-wedge leveling system is a professional standard rather than an optional accessory.
How to Use Tile Leveling Clips and Wedges — The Step-by-Step Process
The tile leveling system follows a consistent sequence at every joint across the floor. Set the first tile in adhesive mortar, working the mortar to uniform depth with the appropriate notched trowel and ensuring full coverage on the tile back. Before setting the adjacent tile, position leveling clips at each joint location — one clip every 8 to 12 inches along the tile edge. The clip base slides beneath the already-set tile edge, with the tab projecting above the tile surface.
Set the adjacent tile, seating it in the adhesive so the leveling clip now straddles the joint — the clip base beneath both tile edges, holding them in lateral alignment. Slide a tile leveling wedge through the slot in the clip base, tapered face toward the clip’s internal contact surface. Drive the wedge forward with a rubber mallet — or a dedicated wedge tightening tool for higher-volume work — until both tiles register at the same height and the resistance is firm. Stop at firm leveling tension; overtightening stresses the clip base and the tile edge, particularly on rectified porcelain where the edge tolerance is tight.
Repeat the sequence at every joint across the installation field. After the adhesive has fully cured — typically 24 hours for standard thin-set, though the specific adhesive product’s curing time governs — remove clip tabs with a firm rubber mallet strike. The clip breaks cleanly at its scored base and is discarded. The tile leveling wedges release intact and are collected for reuse on subsequent rows and future installations.
Tile Leveling Clips 1mm vs 1.5mm — Choosing the Right Thickness
The clip thickness specification sets the minimum grout joint width for the installation. Using the wrong size produces a joint that is either too tight to fill cleanly or wider than the design calls for — problems that require tile removal to correct once the adhesive has cured.
The 1mm clips are the standard choice for rectified tile with precision-cut edges. PSL Floor’s rectified 24″ × 48″ porcelain and ceramic — available on the tile page from $1.79/sq ft — is the exact format where 1mm clips produce the clean, near-seamless joint that large-format rectified tile is engineered to create. Contemporary installations favor the minimal grout line that 1mm spacing delivers with rectified material.
The 1.5mm clips are appropriate when a wider grout joint suits the tile design or edge profile, when the tile is non-rectified, or when site conditions make a slightly wider joint the practical specification. For installers unsure of which thickness fits a specific tile, PSL Floor’s team — the same crew that supplies and installs — can confirm the right specification before an order is placed. Both sizes are in stock at $99 per 3,000 clips, with bulk pricing at $89/3,000 for orders over 15,000 clips.
Porcelain Tile Installation Tips — Getting the Most From the Leveling System
A tile leveling system performs best when the installation conditions support it. For porcelain tile work across the Treasure Coast, a few consistent practices produce the cleanest results.
Verify substrate flatness before setting any tile. The leveling system manages minor variation — it is not a subfloor correction tool. For 24″ × 48″ large-format porcelain, industry standards (ANSI A108.02) require the subfloor to be flat within 3/16″ over a 10-foot span. Address any high spots or depressions before tile begins.
Use full mortar coverage on every tile. Large-format porcelain requires 95% or better adhesive coverage on the tile back. Back-buttering — applying mortar to both the subfloor and the tile back — is the standard approach to achieve full coverage and eliminate the voids that contribute to hollow spots and lippage.
Don’t remove clips before the adhesive has fully cured. The system holds tiles in position while the mortar sets, but removing the clips early defeats the leveling that was applied. Follow the specific adhesive manufacturer’s curing time, not a general estimate.
Keep the reusable tile leveling wedge supply in good condition. After each project, inspect wedges for rounding at the driving profile or micro-flex in the body — both signs the wedge no longer produces consistent leveling tension. A worn wedge delivers inconsistent force at joints late in the installation compared to joints early on. PSL Floor’s 500-wedge supply at $30 makes maintaining a functional wedge inventory practical for any volume of tile work.
Complete Tile Leveling System in Port St. Lucie — PSL Floor & Supply
PSL Floor & Supply stocks the complete tile leveling system for same-day contractor and homeowner pickup: 3,000 professional clips in 1mm or 1.5mm for $99, 500 reusable professional wedges for $30, and a full tile selection including rectified 24″ × 48″ porcelain and ceramic from $1.79/sq ft. For complete flooring projects, the same Port St. Lucie location carries waterproof luxury vinyl plank from $1.69/sq ft, hardwood flooring collections from $4.69/sq ft, and MDF and pine baseboard profiles from $0.89/linear ft to finish the installation edge-to-edge.
PSL Floor’s professional installation team — 11+ years of experience, insured, with a full workmanship warranty — handles tile installations across Port St. Lucie, Stuart, and Fort Pierce for projects where supply alone isn’t the full picture. Free estimates available on all installation work.
The showroom is at 1532 SE Village Green Dr – Unit G, Port St. Lucie, FL 34953, open Monday–Friday 8:00 AM–4:30 PM and Saturday 9:00 AM–3:00 PM. Call (772) 771-7177, email [email protected], or use the contact page to confirm stock, set up a contractor account, or request a free estimate. The tile leveling system, the tile, and the installation team — PSL Floor & Supply delivers all three under one roof.
Frequently Asked Questions
What is a tile leveling system and how does it work?
A tile leveling system is a two-component installation tool — clips and wedges — that prevents lippage by mechanically holding adjacent tiles at the same plane while the adhesive cures. The clip is positioned at each joint straddling both tile edges; the wedge is driven through the clip base to apply leveling force until both tiles register at the same height. After curing, the clip tab is struck off and discarded; the wedge is recovered and reused. PSL Floor & Supply stocks the complete system in Port St. Lucie: 3,000 clips (1mm or 1.5mm) for $99 and 500 reusable professional wedges for $30. Call (772) 771-7177.
What is tile lippage and can a leveling system always prevent it?
Tile lippage is the height difference at a tile joint where one tile sits higher than its neighbor — visible once grout is placed and the floor is under light from an angle. A clip-and-wedge tile leveling system prevents lippage by holding adjacent tiles at the same plane mechanically before the mortar locks them in. The system works best when the subfloor meets flatness tolerances (3/16″ over a 10-foot span per ANSI A108.02). For a properly prepared substrate, the system reliably eliminates lippage across the full installation field.
Should I use 1mm or 1.5mm tile leveling clips for porcelain tile?
For rectified porcelain with precision-cut edges — including PSL Floor’s 24″ × 48″ collections from $1.79/sq ft — 1mm clips are the standard choice. The 1mm thickness produces the close, near-seamless grout joint that large-format rectified tile is designed to achieve. Use 1.5mm clips when the tile has a textured or non-rectified edge profile, when a visible grout line is part of the design intent, or when a wider joint suits the site conditions. Both sizes are in stock at PSL Floor in Port St. Lucie at $99 per 3,000 clips.
How many tile leveling clips do I need for my project?
The standard placement is one clip every 8 to 12 inches along each tile joint. For 24″ × 48″ rectified porcelain, this typically means 2 to 3 clips on each short edge and 4 to 5 clips on each long edge per tile — with each clip counted once since it spans two adjacent tiles. A bag of 3,000 clips ($99 at PSL Floor) covers most residential and contractor projects. Bulk pricing applies at $89/3,000 for orders over 15,000 clips. Call (772) 771-7177 to estimate quantity for a specific project.
Where can I buy a complete tile leveling system in Port St. Lucie?
PSL Floor & Supply stocks the complete tile leveling system in Port St. Lucie for same-day in-store pickup — no minimum order, no shipping wait. 3,000 professional clips (1mm or 1.5mm) are $99; 500 reusable professional wedges are $30. The store is at 1532 SE Village Green Dr – Unit G, Port St. Lucie, FL 34953, open Monday–Friday 8:00 AM–4:30 PM and Saturday 9:00 AM–3:00 PM. Call (772) 771-7177, email [email protected], or use the contact page for contractor inquiries.